
The accelerometer is present in every smartphone, tablet, and portable videogames. In this post, are shown the operation and how to use a module with Arduino.
How does the accelerometer work?
It’s a MEMS (Microelectromechanical system), to learn more about this system, click on the links below.
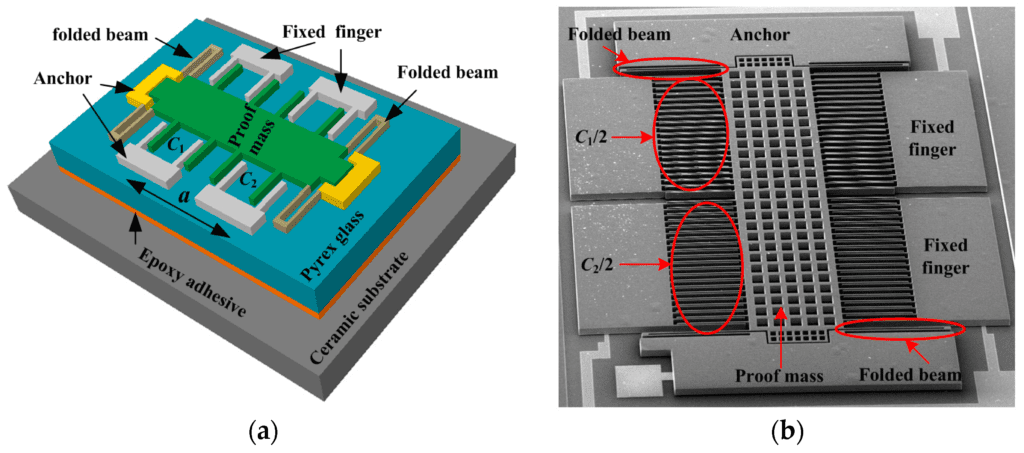
Inside the chip, there’s a mobile mass attached to micrometric springs, and the mass’s motion is converted to electric signals. Can detect inclination angle and static or dynamic accelerations. Static acceleration produces produce a constant force on the body, like gravity. While dynamic acceleration isn’t uniform, for example, vibrations and motion change.
Capacitive accelerometer
In this type, the mobile mass has conductive tips that form a capacitance with stationary tips. When there’s an acceleration, the mobile part moves, and C1 and C2 capacitances change value.
Piezoelectric accelerometer
When mechanical pressure is exerted on a piezoelectric material, the latter produces a potential difference.
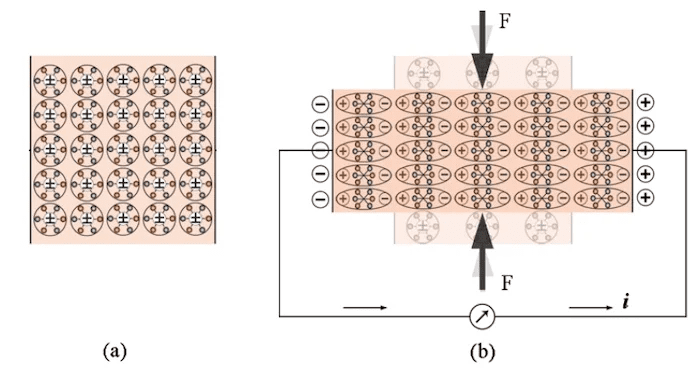
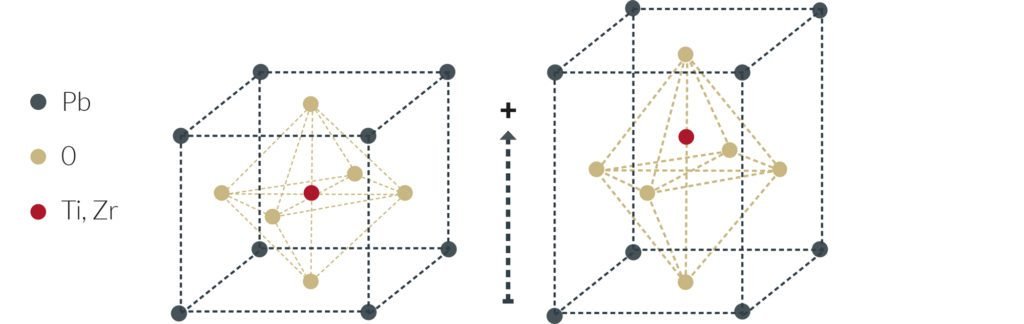
The piezoelectric effect is reversible. A direct current can stretch or compress the material, depending on the direction. While the alternate current makes the material vibrate. The most used piezoelectric materials are quartz and PZT (lead zirconate titanate).
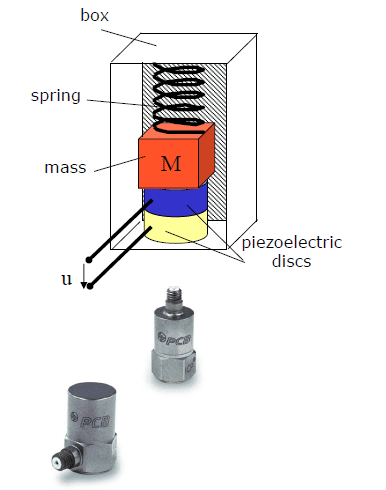
In the piezoelectric accelerometer, the motion of the mass attached to a spring exerts pressure on a piezoelectric disk and it transmits electric signals to be processed for measurement.
Piezoresistive accelerometer
Proof mass’s motion exerts force over a piezoresistive material, the latter changes electrical resistance that is measured by a strain gauge. It’s an instrument with a Wheatstone bridge that measures material’s deformation.
Other types of accelerometers will be subject to another post.
Where else are accelerometers used?
- The accelerometers are used in notebooks to protect HD data from falls. When a fall is detected, the notebook shut down the hard drive to not damage data reading.
- It’s a very important component in rockets and missiles, to measure the variation of speed and help with inertial navigation.
- A drone needs an accelerometer for flight stabilization.
- Airbag systems on automobiles have an accelerometer to detect a collision and activate the airbag.
- Rotative machines use accelerometers to detect vibrations.
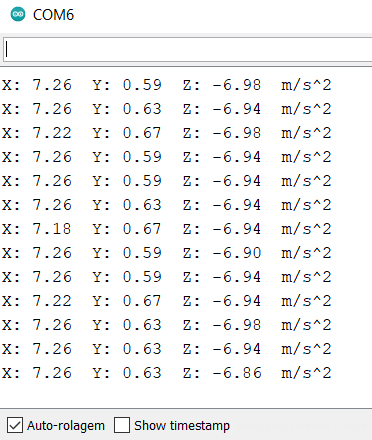
The accelerometer shield ADXL345
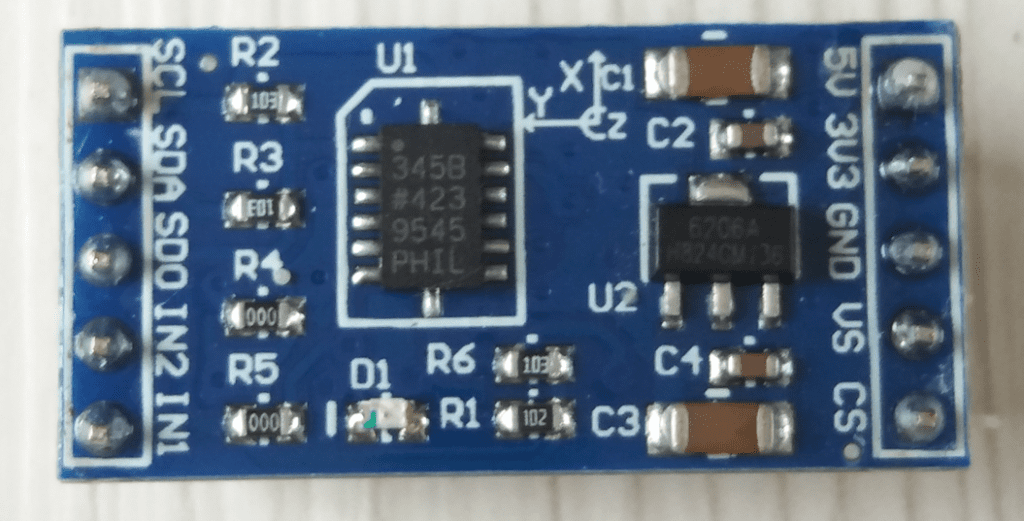
ADXL345 is a 3-axis capacitive accelerometer with 13 bits resolution and low power. Can measure between ±2g and ±16g. g is the Earth’s gravity acceleration, whose value is 9,81 m/s², and detects changes in inclination angle lower than 1º. This chip was manufactured by Analog Devices.

More information about the chip is in the datasheet.
Example of a demonstration project
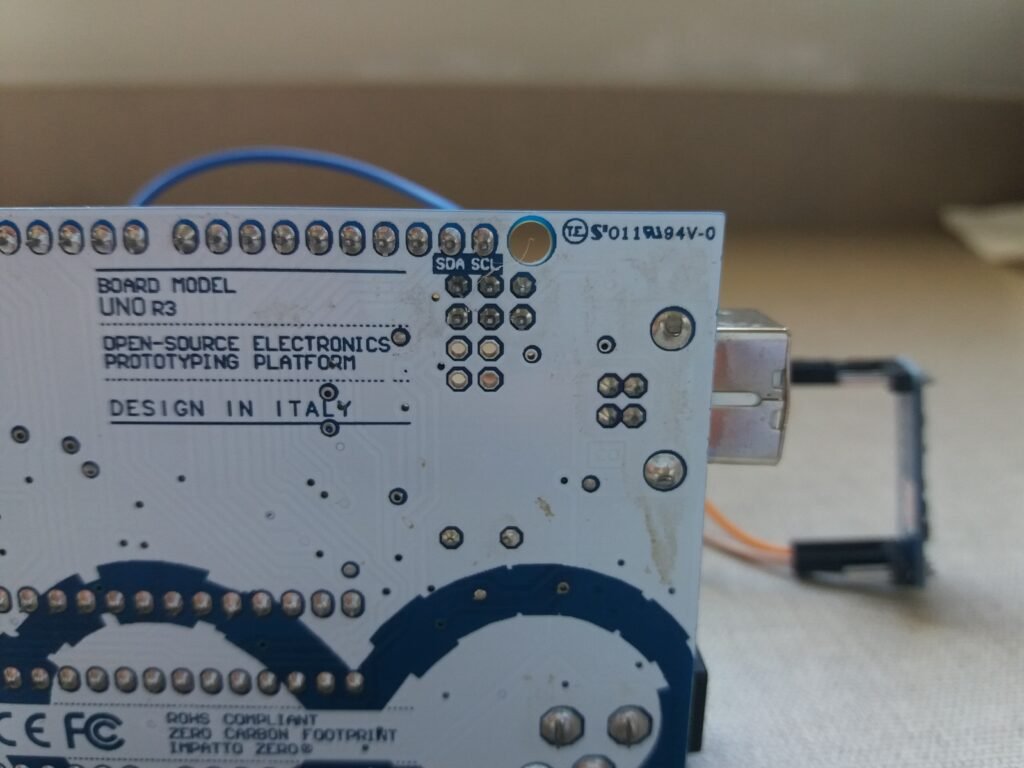
The ADXL345 is connected to an Arduino Uno board with an I²C internet protocol. This will be subject to another post.
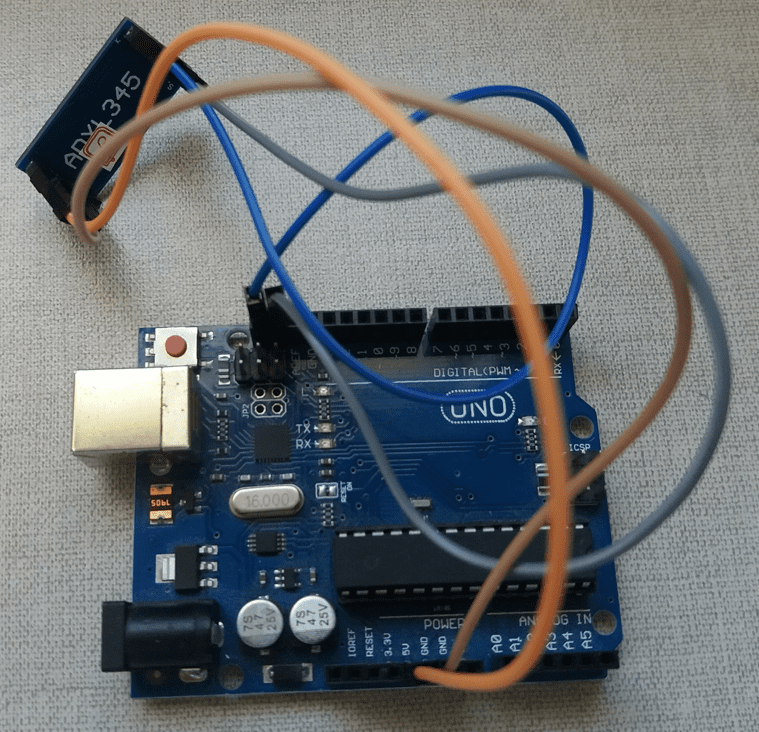
To simplify the code, download two libraries shown in the video.
In the program below, the first 3 lines are libraries that must be included. The Wire.h serves to make I²C communication.
#include <Adafruit_Sensor.h>
#include <Adafruit_ADXL345_U.h>
#include <Wire.h>

Adafruit_ADXL345_Unified accel = Adafruit_ADXL345_Unified();  //initializes
                       //the library with accel variable.

void setup() {
  Serial.begin(9600);
   if(!accel.begin())
   {
      Serial.println("No ADXL345 sensor detected.");//This message appears
                    //when the sensor isn't connected to SCL and SDA.
      while(1);
   }
}
void loop() {
   sensors_event_t event;//The event variable uses the structure
                                  //sensors_event_t.
   accel.getEvent(&event);//Function that collect accelerometer data.
   Serial.print("X: "); Serial.print(event.acceleration.x); Serial.print("  ");               //Printing measures.
   Serial.print("Y: "); Serial.print(event.acceleration.y); Serial.print("  ");
   Serial.print("Z: "); Serial.print(event.acceleration.z); Serial.print("  ");
   Serial.println("m/s^2 ");
   delay(500);
}
It’s possible to use this accelerometer only with Wire.h library. However, it would have to use the registrators’ addresses, which need to be explained in a dedicated post.